Unlocking Advanced Options for Customizing User Roles in WordPress
User roles in WordPress allow you to define the access and amount of control different users have over your site’s content and settings. It’s one of the main ways website admins can ensure the security of their data and the efficiency of the website management process.
By default, WordPress comes with five distinct user roles, each tailored with specific capabilities to suit different levels of access:
- Subscriber
- Contributor
- Author
- Editor
- Administrator
For multisite installations, a sixth role, Super Admin, is also available, and it has even more distinct capabilities for managing the network.
While assigning or modifying these roles in WordPress is relatively easy, you’ll need some extra help for more advanced customizations. This might involve using specialized user role plugins or directly coding your own solution.
In this article, we’ll go into these advanced options and introduce a powerful tool for better user role management (psst, it’s Admin Columns).
How to edit and customize user roles in WordPress
You can carry out a couple of basic user role management tasks directly from the WordPress admin panel:
- Creating a new user and assigning a role to them.
- Manually changing a user’s role from the Users list table (either individually or in bulk).
However, if you want to change the capabilities or permissions of a particular role, add a new role, or delete an existing role, you’ll need to look beyond what is possible from the default admin area. We’ll cover two methods to achieve this next.
Leveraging plugins to edit and customize user roles
The easiest way to add, remove, and customize user roles in WordPress is with the help of a plugin. Some plugins, like WooCommerce, will automatically create new user roles when added to your site. However, to create your own custom role, you’ll need a dedicated user roles plugin.
Popular options include User Role Editor, Members, and PublishPress Capabilities. Here’s how to add and customize user roles with the free User Role Editor plugin:
-
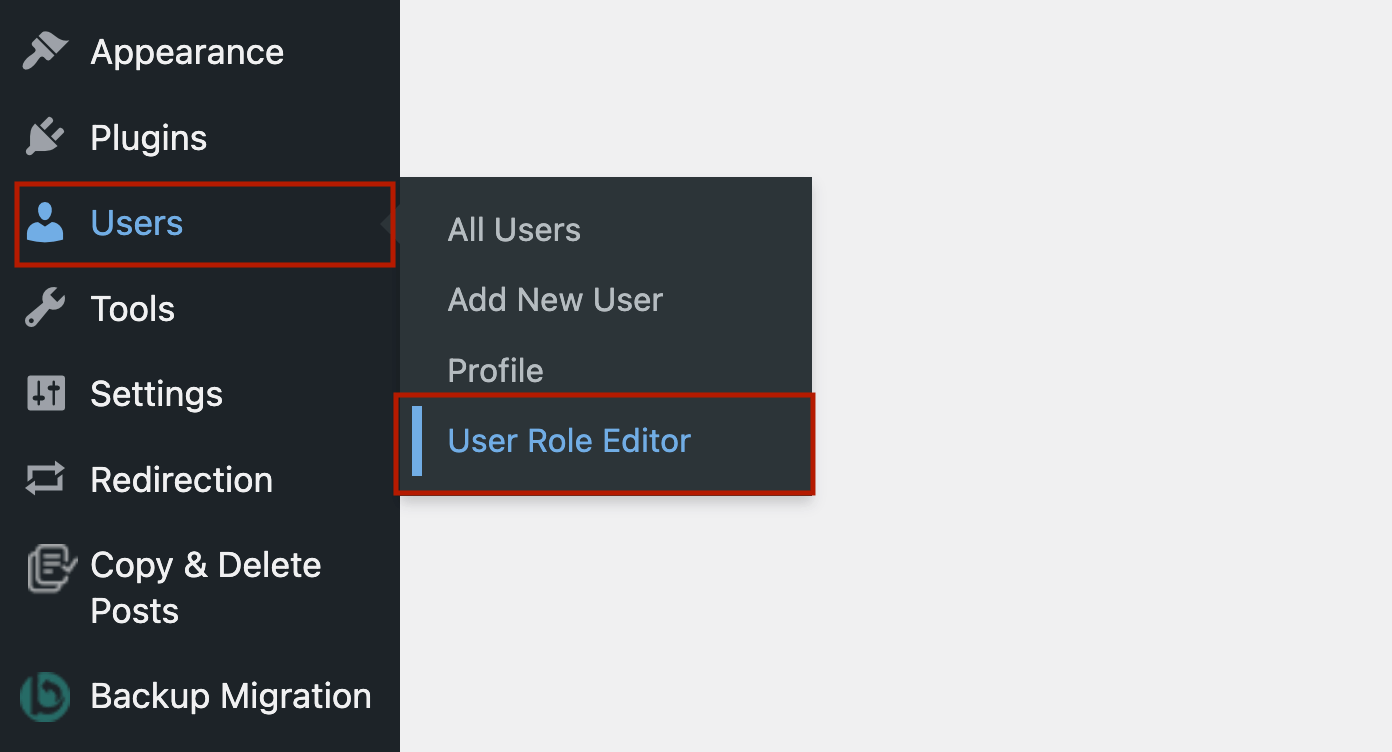
Go to Users > User Role Editor.
-
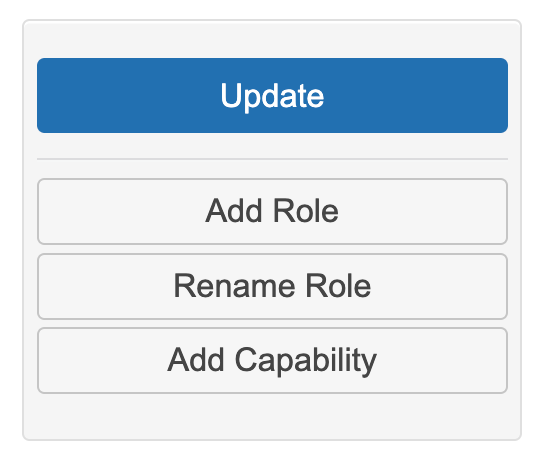
Click Add Role.
-
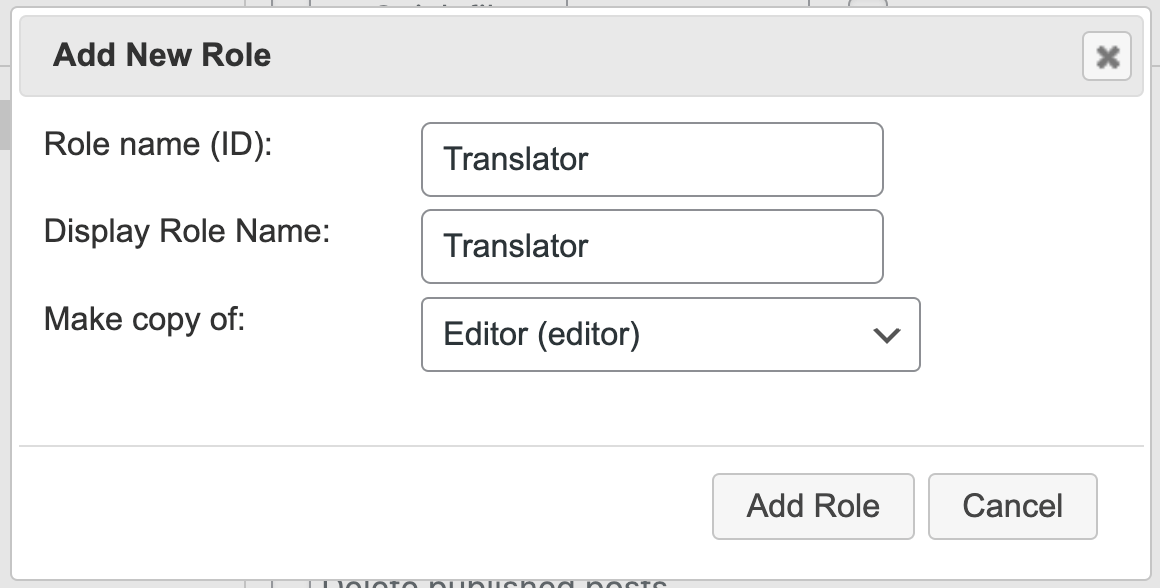
Add an ID and Display Role Name, and click Add Role.
-
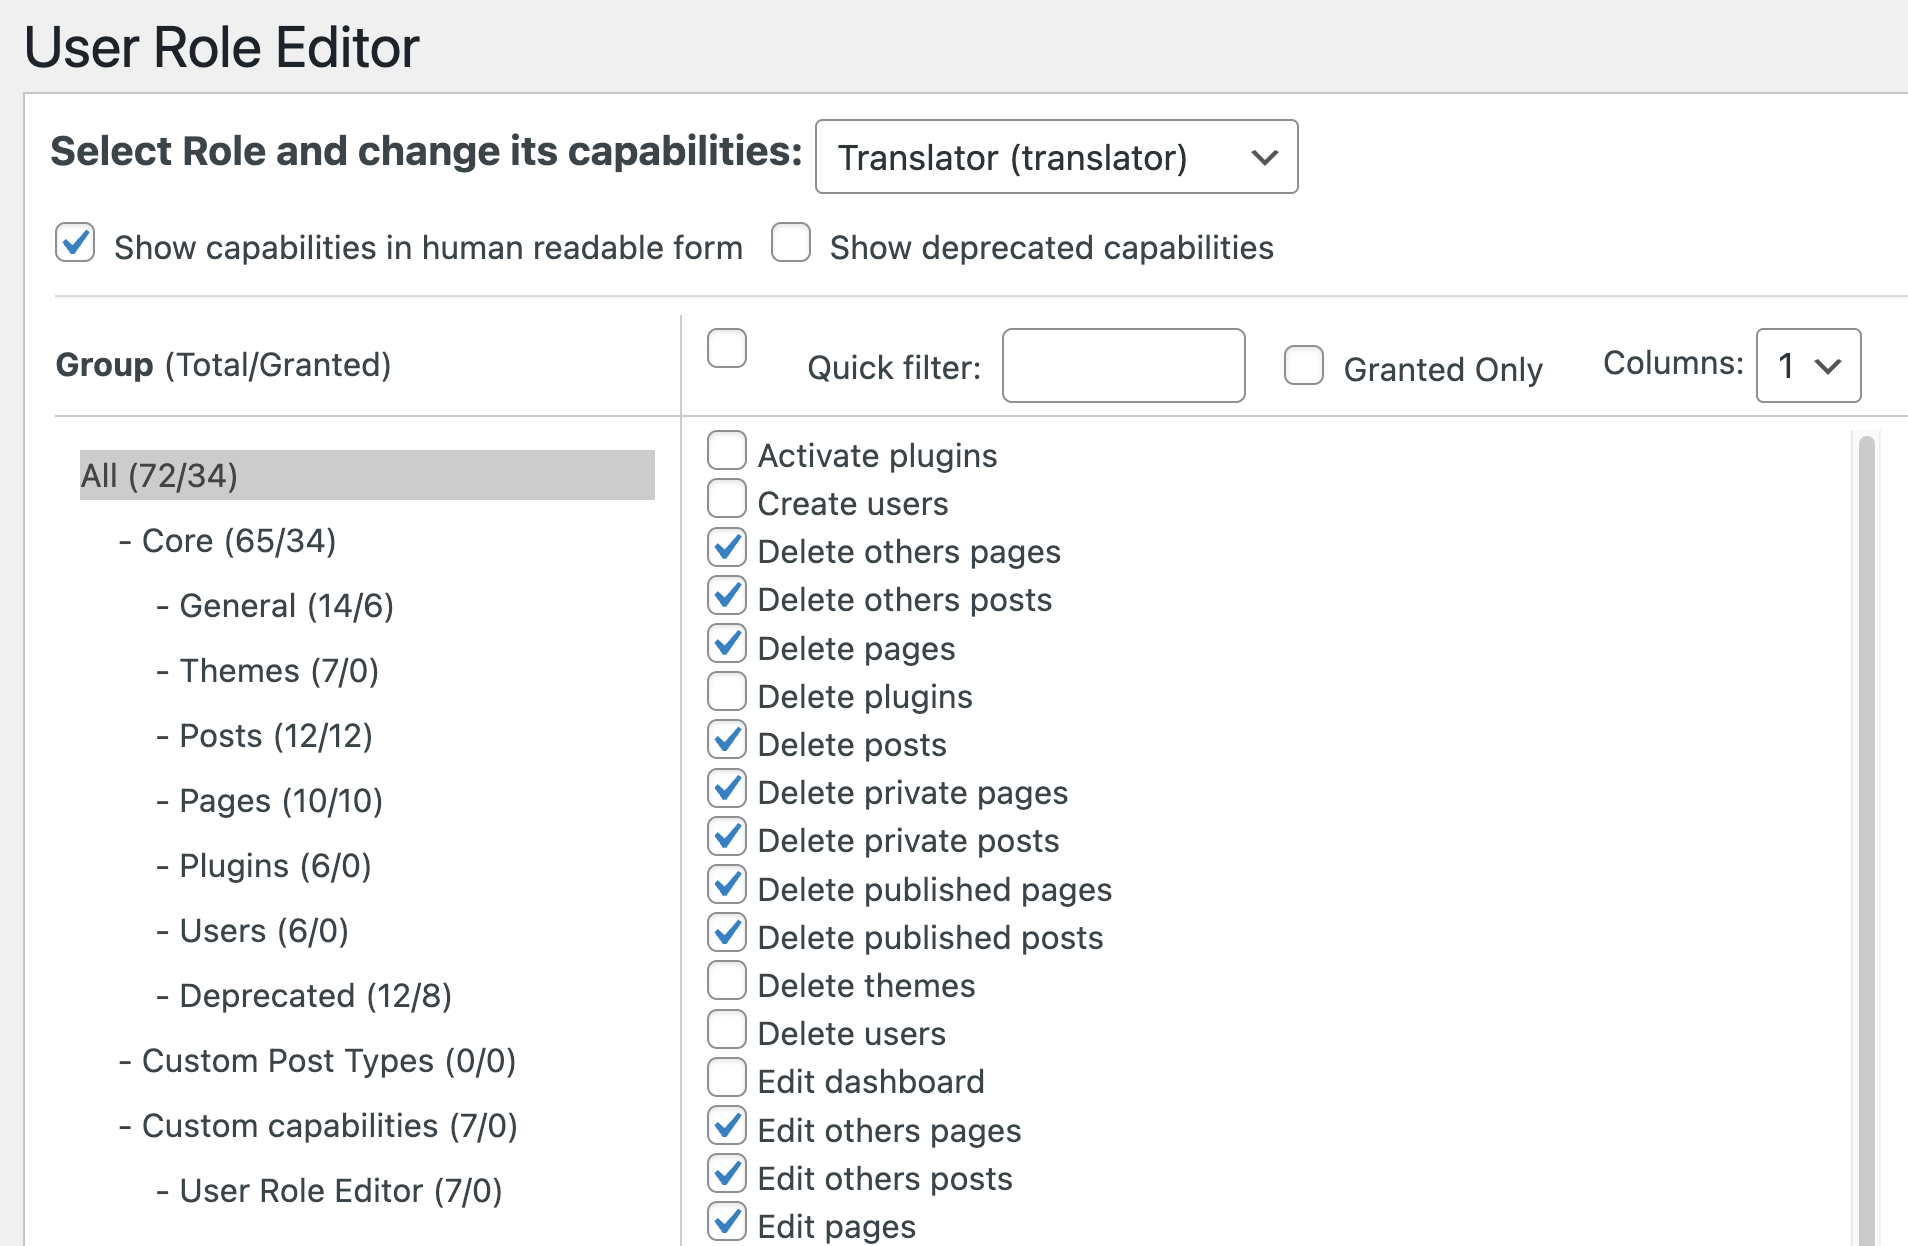
Choose what capabilities you want to assign to the role.
-
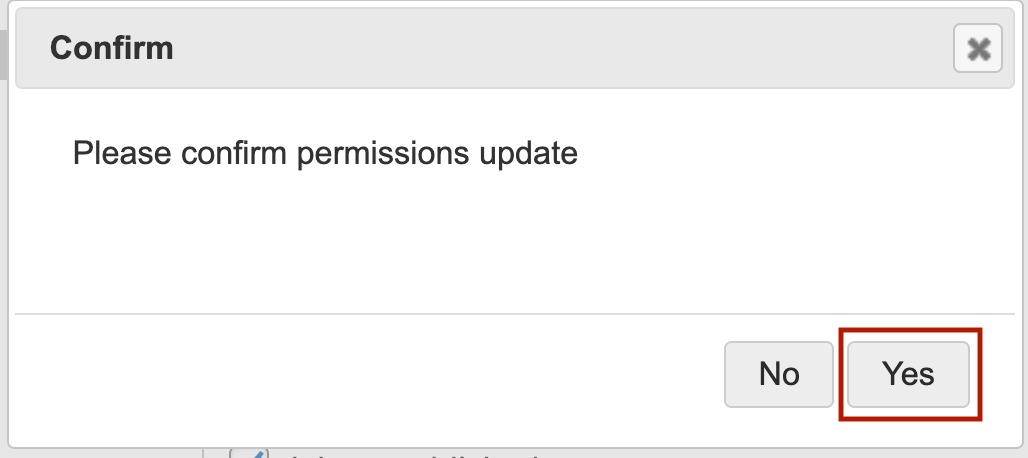
Click Update and then select Yes in the Confirm window.
Editing a role is also easy. Here is what you need to do:
-
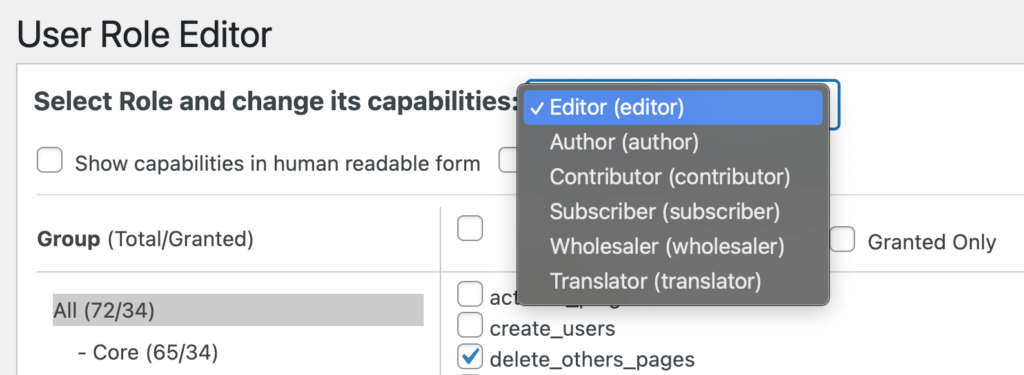
Select the role you want to amend from the top dropdown menu.
-
Check the Show capabilities in human readable form box to make it easier to understand the listed capabilities.

-
Select/deselect the capabilities you want to add to/remove from the chosen role by checking the associated boxes.
-
Click Update, then select Yes in the Confirm window.
Adding, removing, and editing user roles manually
Experienced developers can also add or remove roles or make changes to existing roles manually by editing their child theme’s functions.php file. WordPress provides five functions for managing roles and capabilities:
- add_role() – creates a new custom role.
- remove_role() – removes an existing role.
- add_cap() – adds capabilities to a role.
- remove_cap() – removes capabilities to a role.
- get_role() – provides information about a role and its capabilities.
Here are the steps to add a new role with custom capabilities manually using the theme editor:
- Access your WordPress files using an SFTP client (like Filezilla) or via your web host’s file manager.
- Go to your child theme’s functions.php file.
- Add the following code snippet:
add_action('init', function() {
    add_role('new_role', 'New Role', []);
});
In this code, add_action is a WordPress function that hooks a custom function into a specific point in the WordPress loading process. Here, it hooks into the ‘init’ action, which runs after WordPress has finished loading but before any headers are sent.
The function() { … } part is an anonymous function (a function without a name) that will be executed when the ‘init‘ action occurs. In it, ‘new_role‘ is the role’s unique identifier, ‘New Role’ is the name that will be displayed in the WordPress admin panel, and [] defines the capabilities assigned to the role.
For example, if you wanted to create a new role called “Content Manager” that had responsibilities for managing posts on your site, you might add the following code snippet:
add_action('init', function() {
    add_role('content manager', 'Content Manager', [
        'read' => true,
        'create_posts' => true,
        'edit_posts' => true,
        'edit_others_posts' => true,
        'publish_posts' => true,
        'delete_posts' => true,
    ]);
});
A full list of capabilities can be found in WordPress’s guide on roles and capabilities. For a more granular approach, check WordPress’s developer resource on map_meta_cap() function.
Enhancing WordPress role management with Admin Columns
These plugins are great at creating and customizing user roles, but if you want a bit more control over your user roles from your WordPress admin area, you might want to try Admin Columns. This invaluable plugin allows you to fully customize, add, and remove user-related columns and manage their data directly from the list table.
Here are the main ways in which this plugin can help you get more out of your user roles:
-
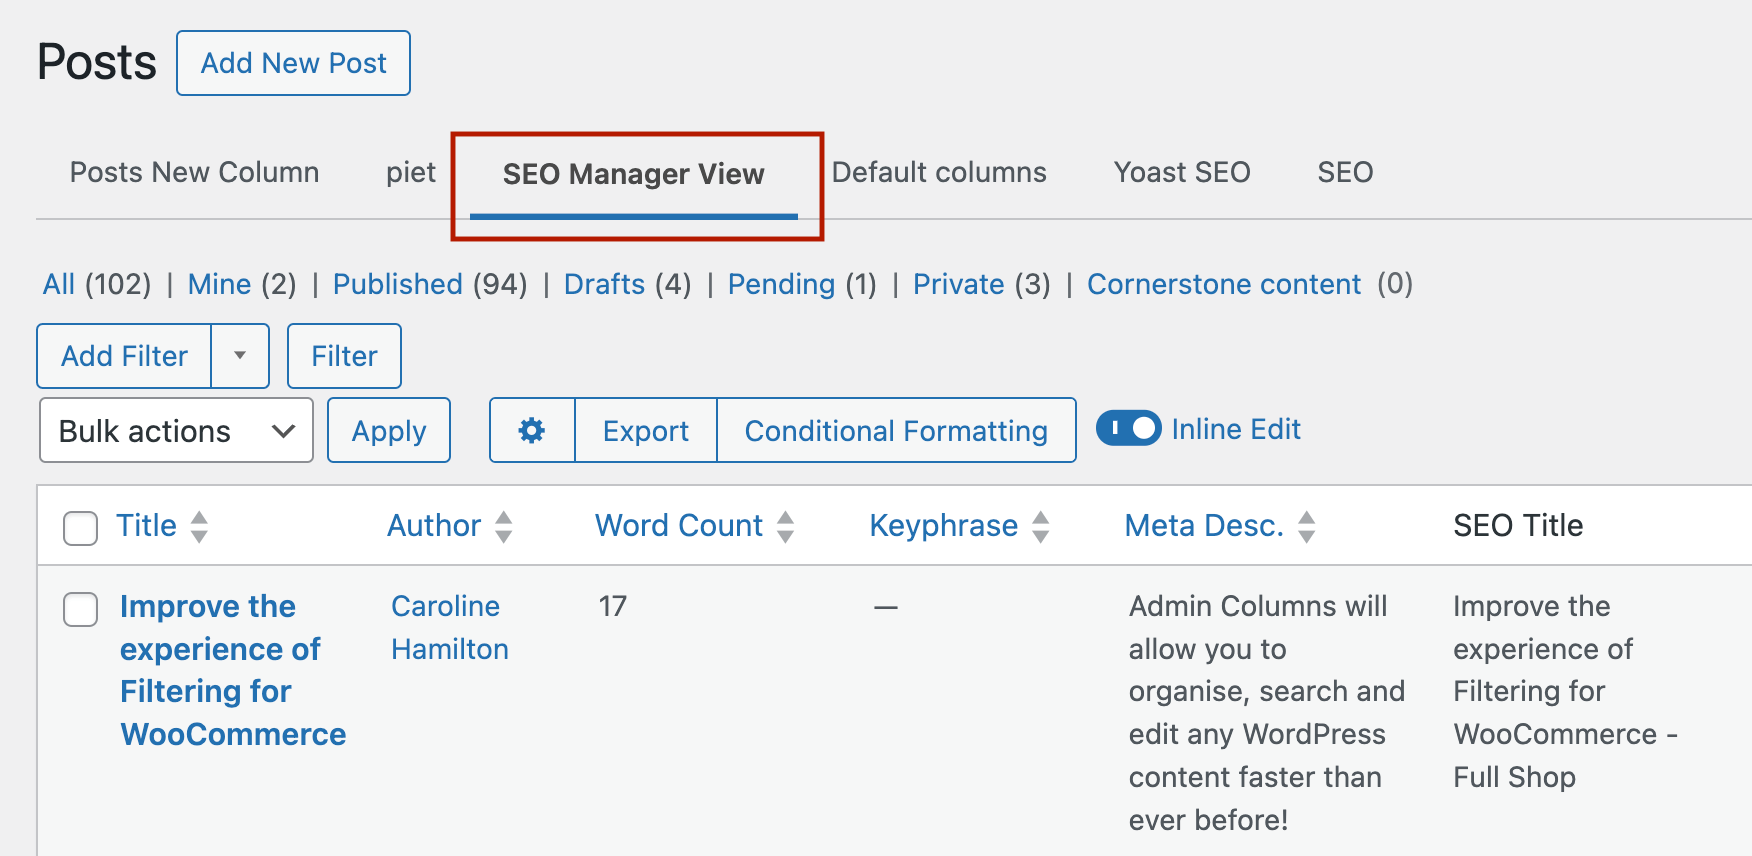
Create different table views for specific user roles: Admin Columns’ Table Views feature lets you create custom views of your WordPress list tables and limit access to specific user roles. For example, you could create a new view for your Posts list table that displays all of the SEO metadata about your posts and limit its visibility to only your SEO Manager role (we’ll actually show you how to do this in a little bit).
-
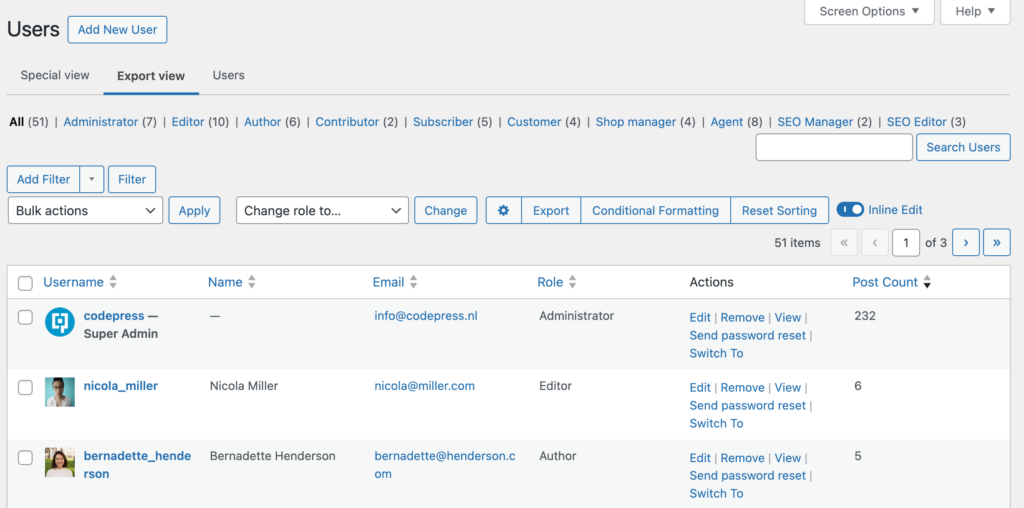
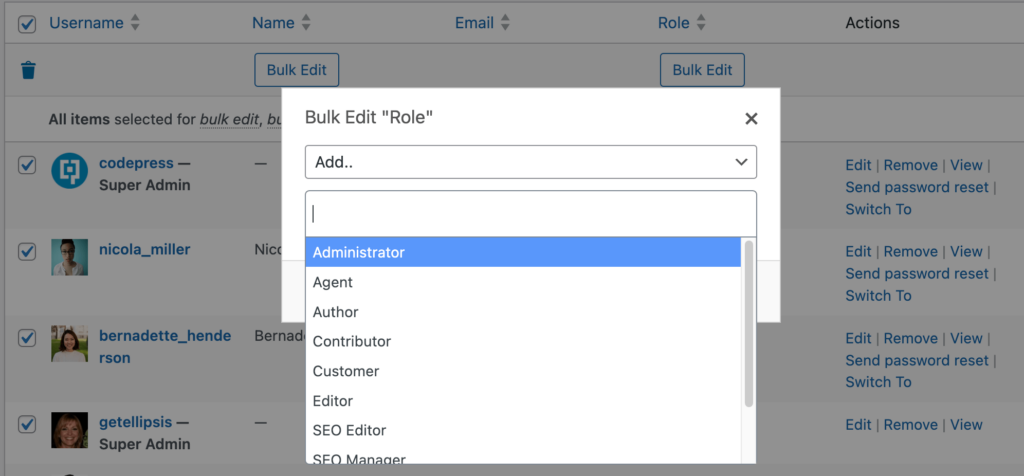
Update your user roles from the list table: Admin Columns makes it easy to update user roles individually or in bulk from the Users list table using its inline edit and bulk edit functionality. Update unlimited user roles simultaneously or adjust individual roles without the need to manually access each user.

-
Bulk editing user roles
-
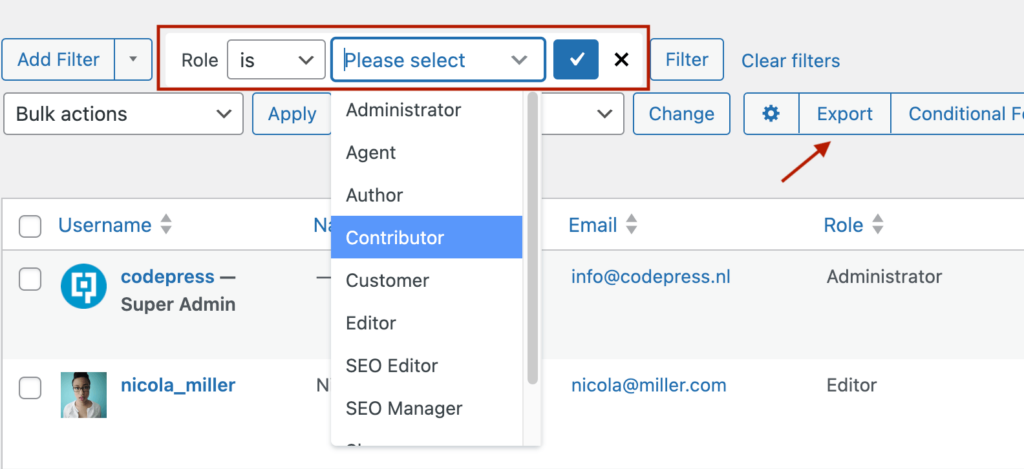
Segment and export user data: Sort your Users list table by almost any column, add unlimited smart filters to easily segment which user data you want to access, and export your tailored user list to CSV with just a few clicks.
How to create a table view for a specific user role
As we mentioned, Admin Columns offers a powerful feature that allows you to create custom views of your WordPress list tables, which can be specifically tailored to different user roles or individual users. This functionality improves management efficiency by allowing you to display only the most relevant information to each role.
Here’s a quick step-by-step guide on how to set up these views:
-
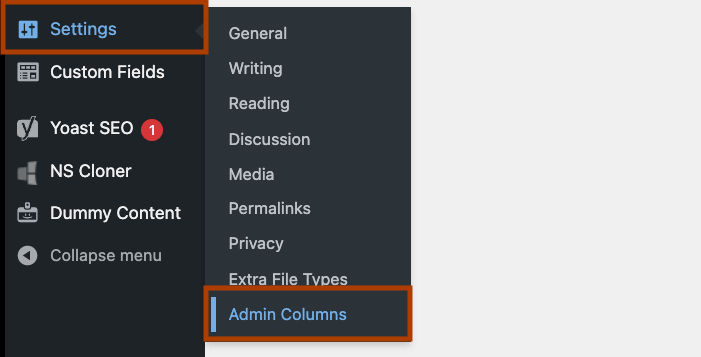
Start by going to Settings > Admin Columns on your WordPress dashboard.
-
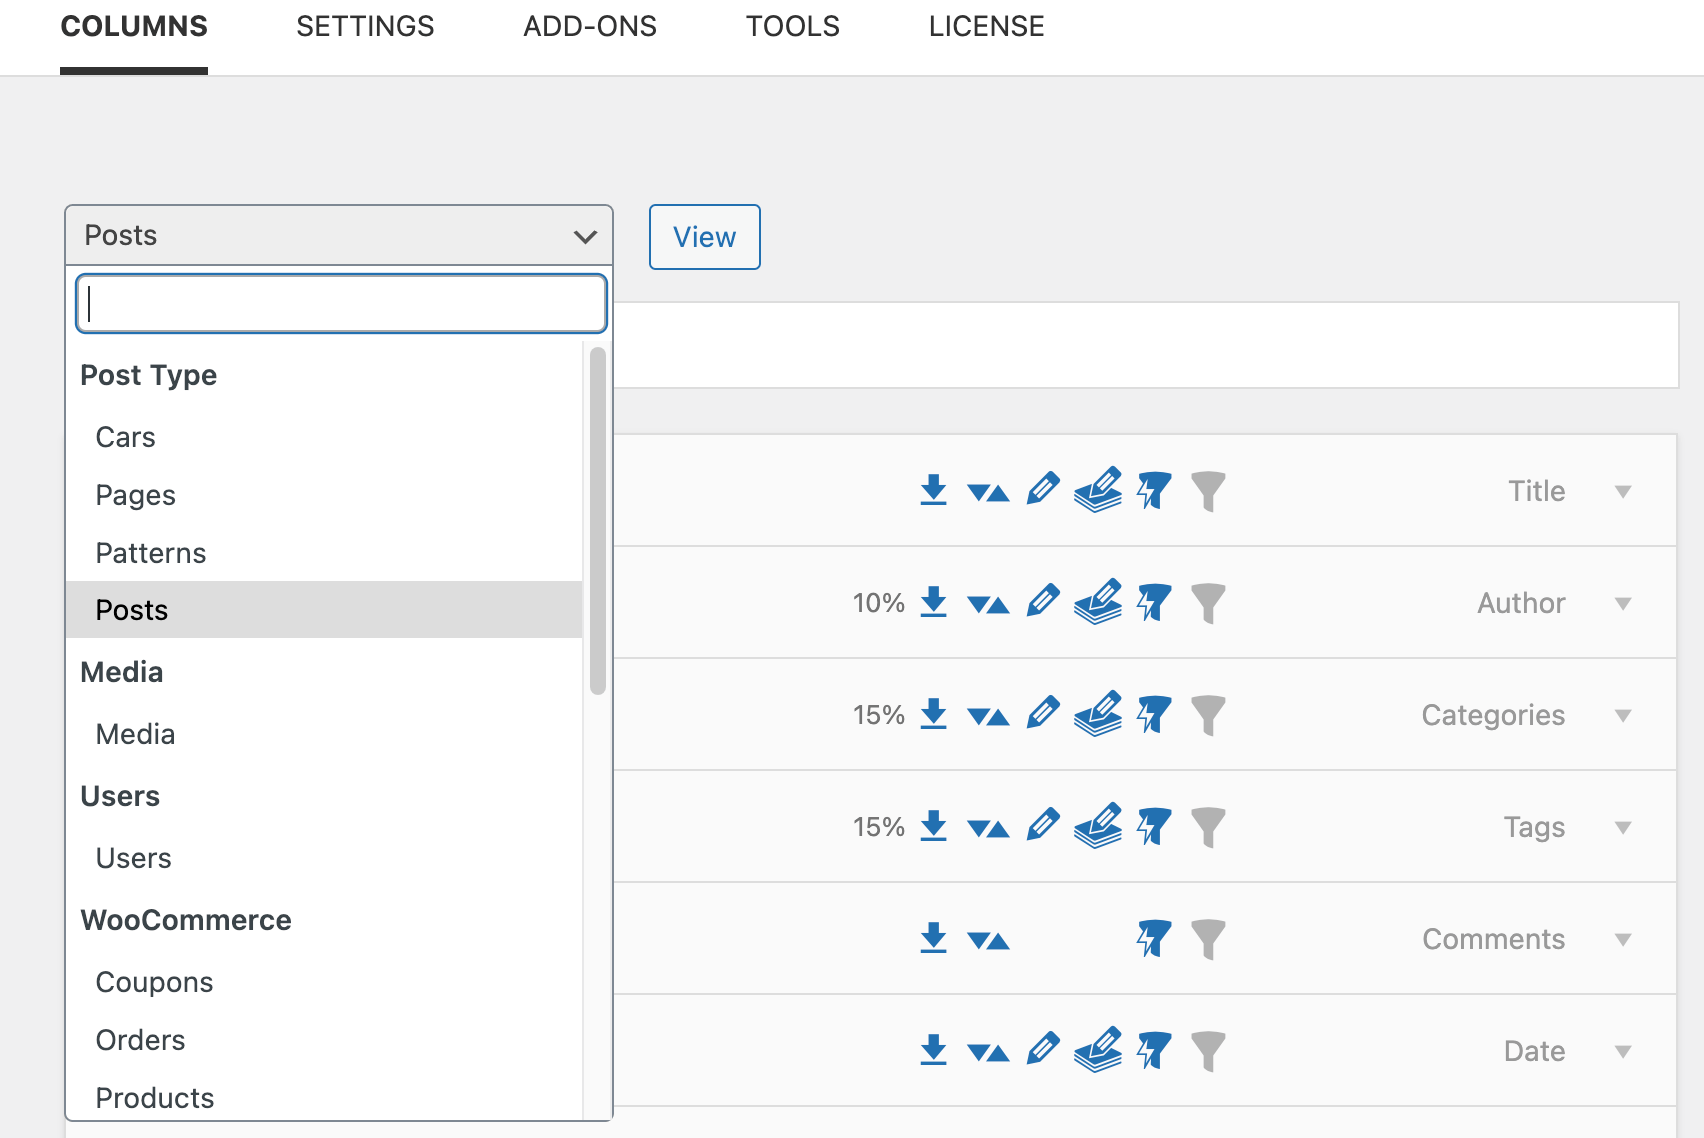
In the Columns tab, select the list table you want to customize in the dropdown menu at the top. In our example, this will be the Posts table.
-
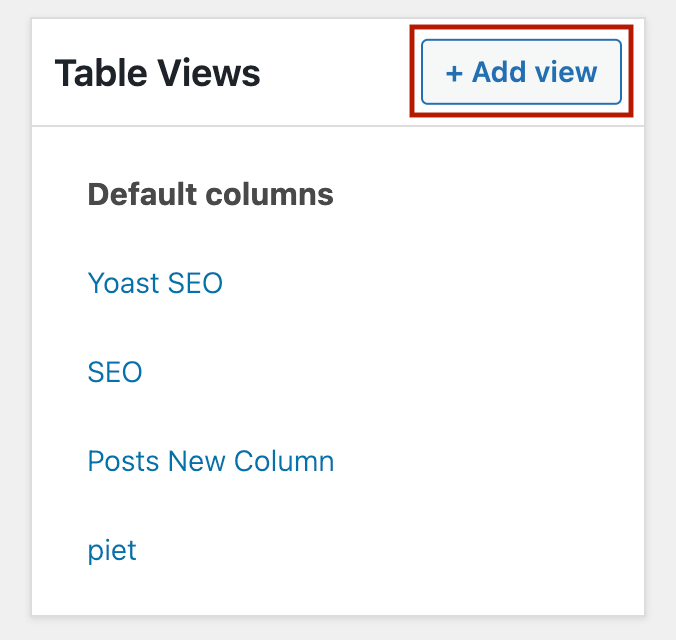
Click on + Add View in the Table Views area.
-
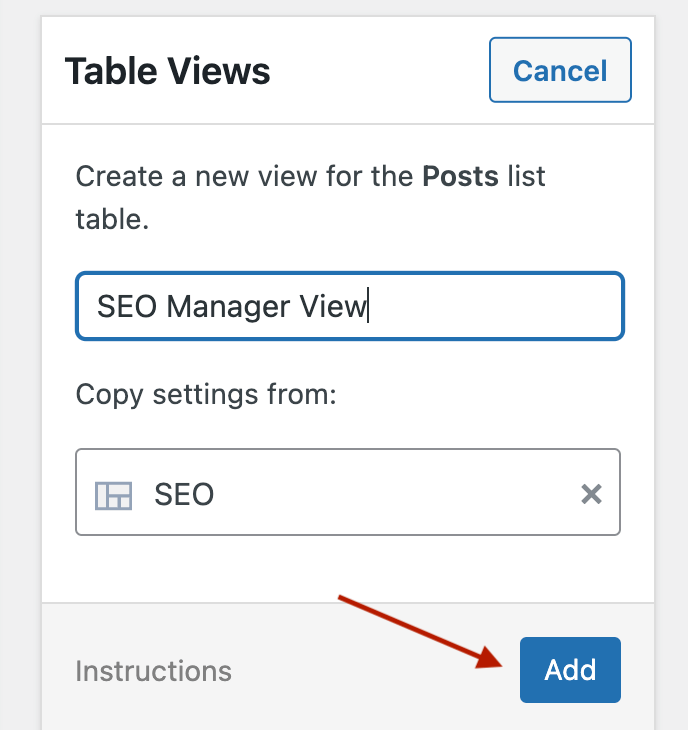
Name your new view, choose an existing view to copy settings from, if applicable, and click Add.
-
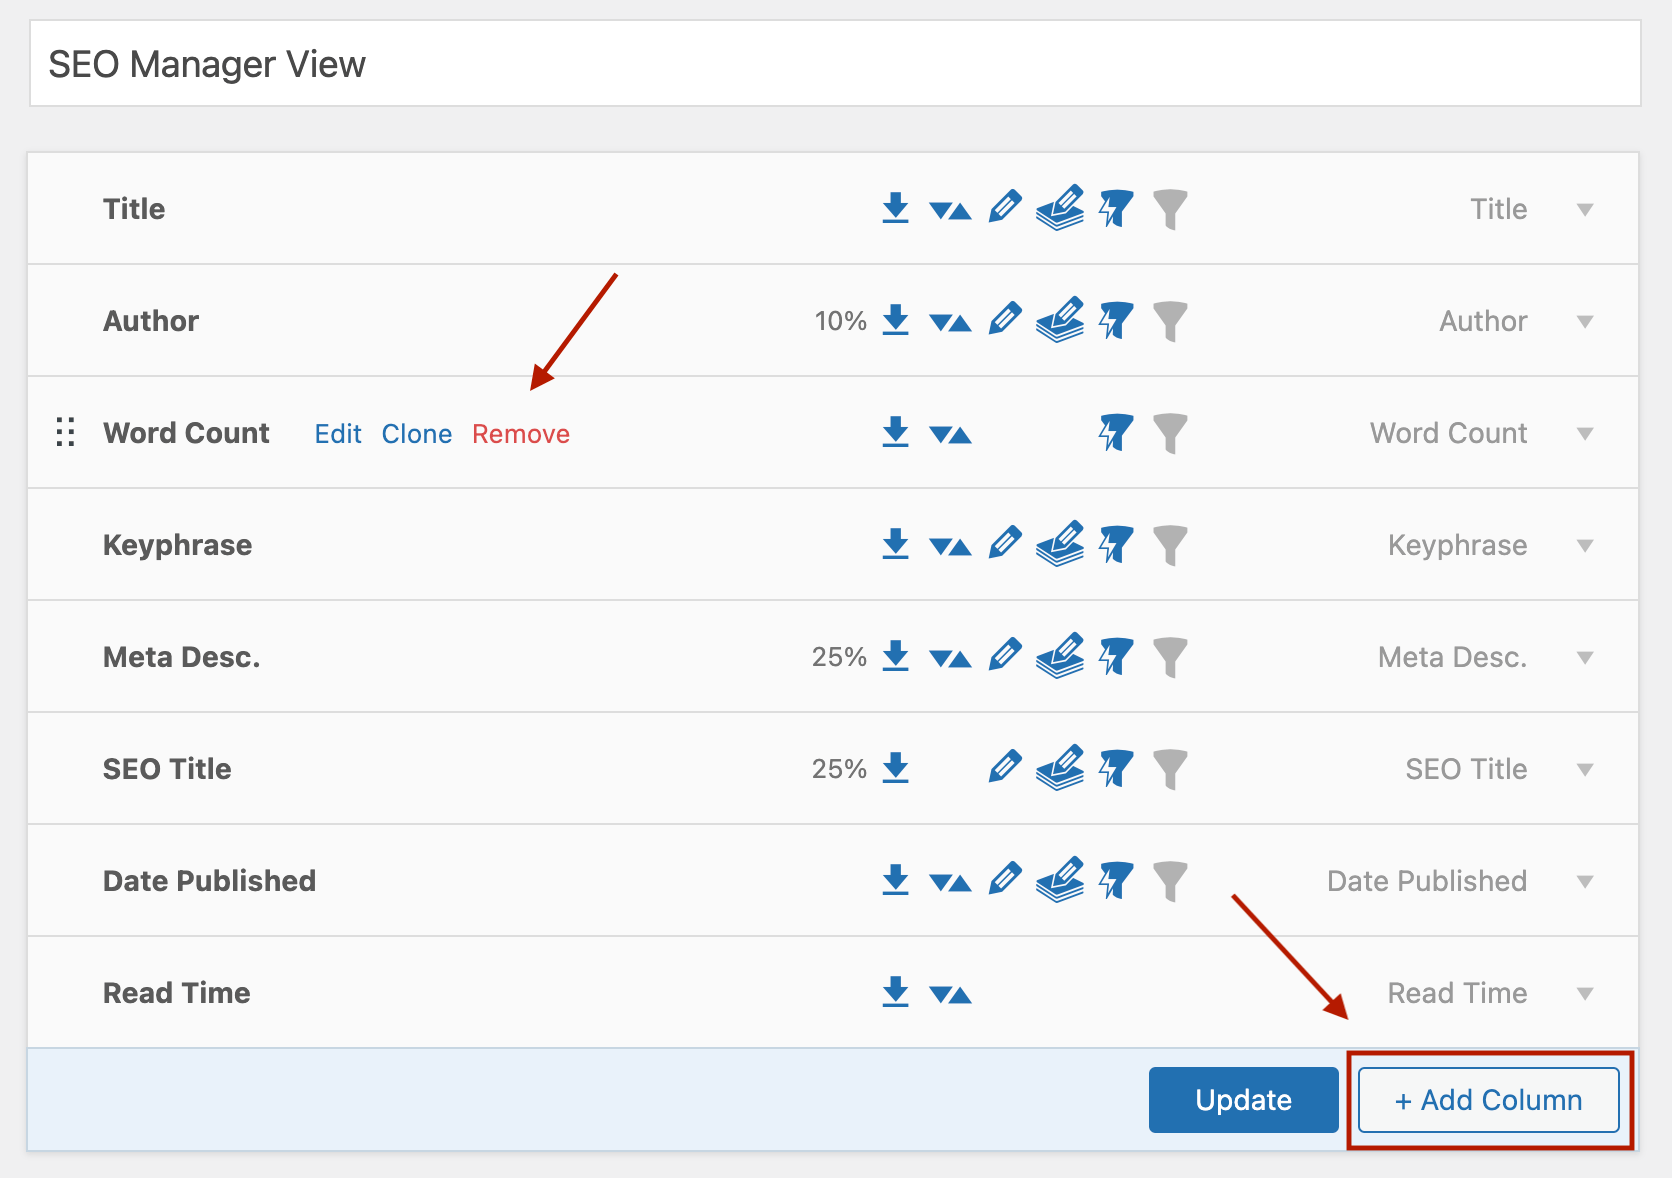
Add or remove columns by using the + Add Column button or the Delete button on any existing column.
-
In the Conditionals section of the Settings area, you can select specific roles or users to determine who can see this view.

-
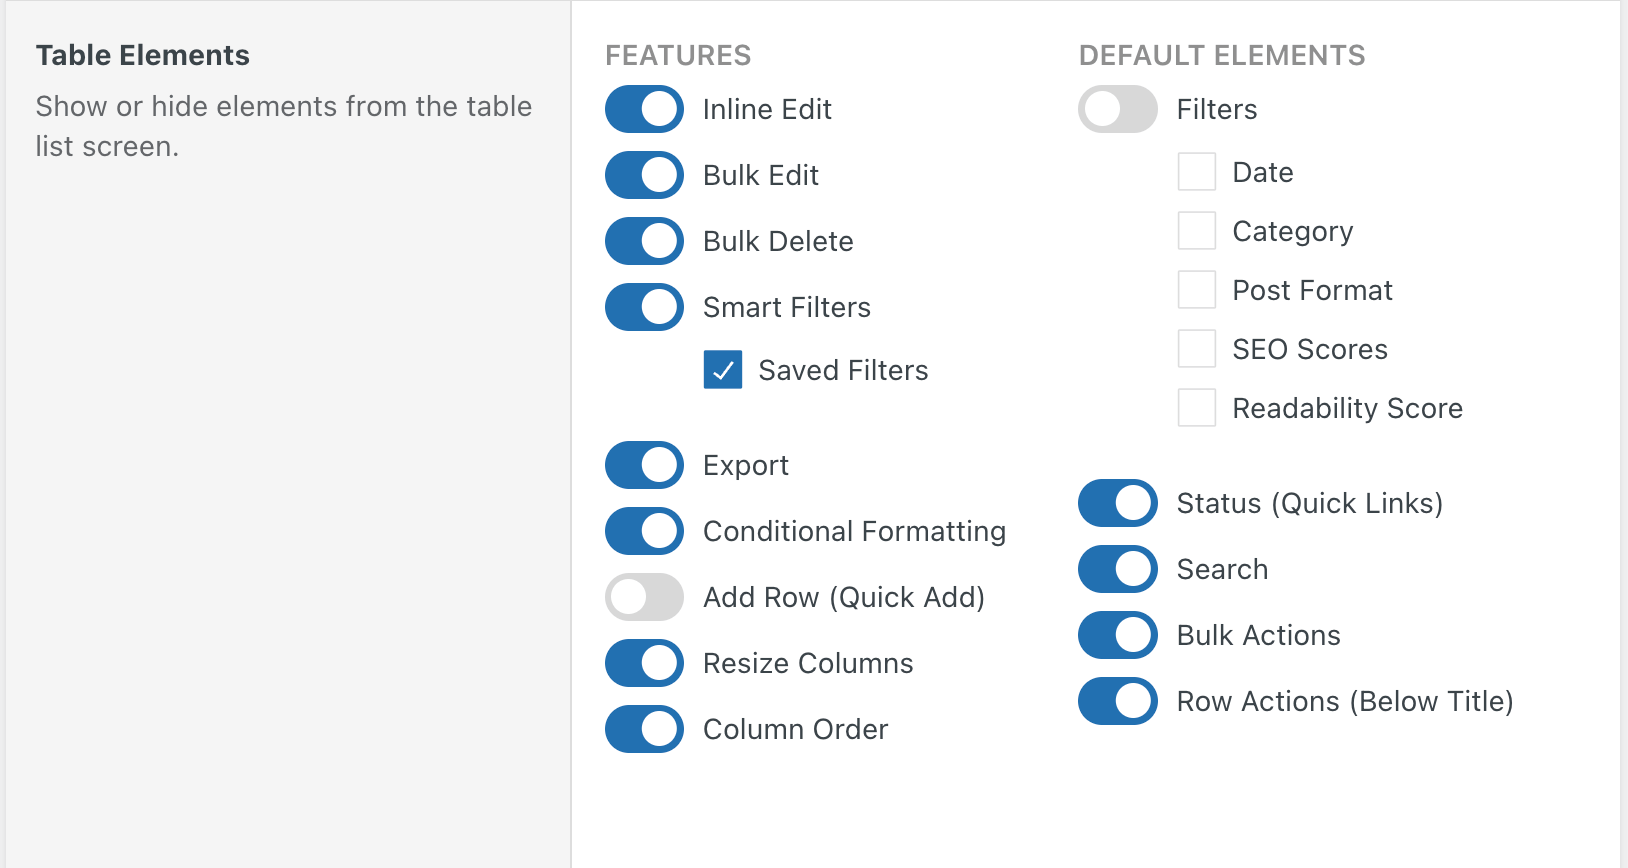
Below that section, you’ll see additional settings for this table view that allow you to give or take certain actions from the user roles, such as exporting data, adding filters, or inline editing.
-
Once you are satisfied with the setup, click Save to apply your changes.
-
Go to the list table for which you created the view. You will see the new view as a tab at the top of the dashboard. This tab will only be visible to the users or roles that have been granted access.
We encourage you to explore our complete guide on user list management for more detailed insights into how Admin Columns can transform your site administration.
Optimize user roles on your WordPress site
Effective user role management is crucial in WordPress, allowing you to control what different users and contributors can and cannot do on your site. While WordPress provides basic user role management capabilities, these can be significantly enhanced with the help of dedicated plugins or custom code.
Admin Columns takes user role management to the next level by offering advanced features such as sortable, filterable, and editable columns for improved administration. You can directly edit data, such as user emails, names, roles, and other custom attributes, right from the overview screen. The plugin also allows you to export column setups to CSV, as well as import, export, and save configurations. Take the next step in optimizing your use of user roles by trying out Admin Columns today!
Get Admin Columns Pro
Effortlessly sort, filter, edit, export, and organize content in the WordPress admin.
