Export Gravity Forms Entries in Bulk
It’s 9:47 AM. Your sales director just pinged you for “that spreadsheet with all the Q1 leads”. Should be simple, right? You see all the Gravity Forms data on your screen, but how are you supposed to transfer that to Excel without copy-pasting for three hours and still keeping the proper formatting?
Yes, Gravity Forms can export your data. But there’s a massive gap between clicking that Export button and actually delivering the clean, professional spreadsheet your colleague needs. You know the drill: download the raw CSV, open Excel, delete the junk, merge multiple files, fix the formatting disasters, and finally – finally – send that “simple” report.
Why exporting your form data properly matters:
- Analysis: Transform raw submissions into actual insights using spreadsheet tools that WordPress simply can’t match.
- Data backup: Protect valuable customer information from site crashes, hacks, or accidental deletions.
- Decluttering: Keep your database lean and tidy, archiving old entries and keeping the important ones easy to find.
This article will show you exactly how to export and manage your form entry data like a pro. We’ll cover the native Gravity Forms export feature, explore ways to combine multiple forms and export to different formats, and reveal how Admin Columns can transform your entire workflow – turning hours of manual cleanup into a five-minute task.
Let’s begin!
How to export Gravity Form entries with its standard export feature
Gravity Forms includes a built-in export feature at Forms → Import/Export → Export Entries that creates CSV files.
Here’s what you can do with it:
-
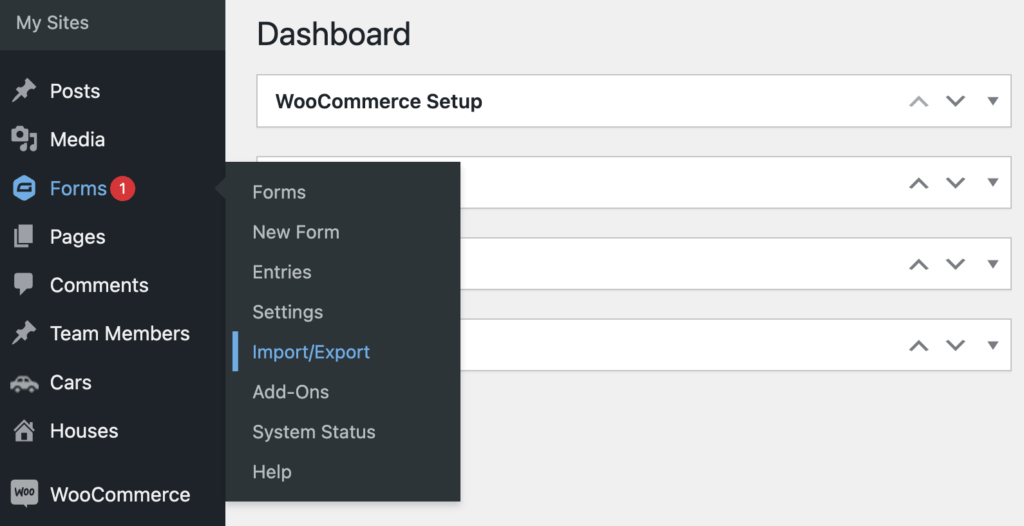
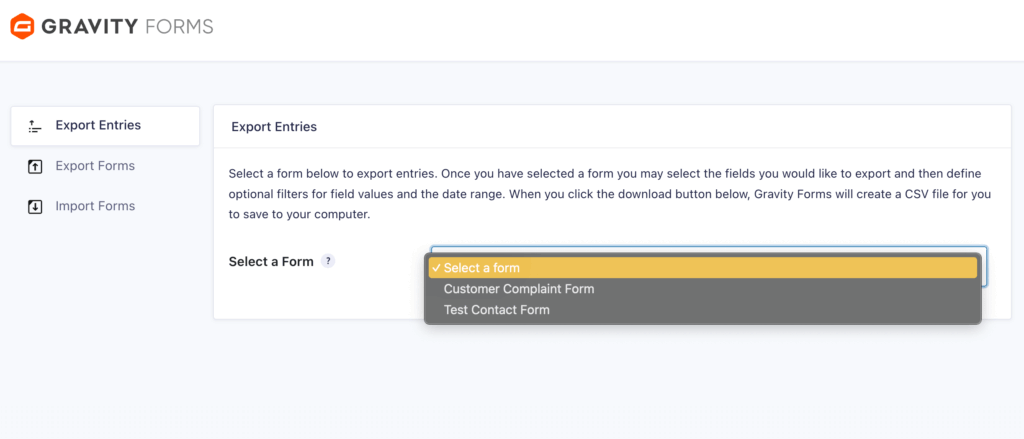
Log in to your WordPress admin dashboard and hover over Forms in the main menu. Click on Import/Export, which will take you directly to the Export Entries tab.
-
Choose the specific form you want to export from the dropdown menu. Important: You can only export one form at a time – there’s no way to combine multiple forms in a single export using the native feature.
-
Once you’ve selected a form, you’ll see all available fields with checkboxes. Select exactly which data you want in your export, such as email addresses, IDs, comments, and any custom fields you’ve created.
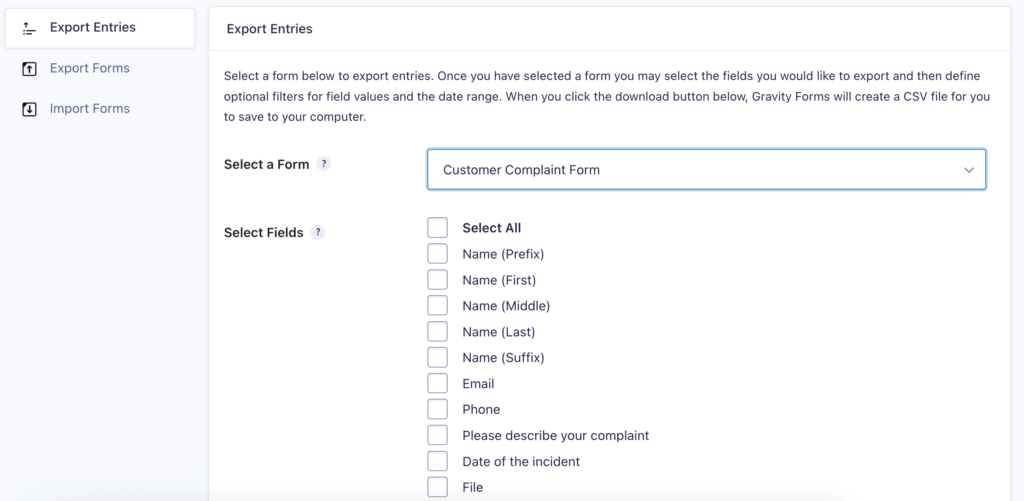
Pro tip: Skip unnecessary fields to keep your CSV clean. There’s nothing worse than a spreadsheet with 47 columns when you only needed 5.
-
Add conditional logic to filter out unwanted entries before they hit your spreadsheet. For example, here’s how to exclude test submissions.
- Click “Add a condition.”
- Set up: Export if [Email] [is not] [test@example.com]
- Add another condition: AND [Email] [is not] [your@email.com]

-
Set up your date range or leave it blank to export all entries.

-
Click the Download Export File button. Your browser will download a CSV file containing exactly the data you specified.
Did you know? Spam entries are automatically excluded from exports. Gravity Forms filters them out, so you’re only getting legitimate submissions in your CSV
Native export limitations
The built-in export works perfectly for occasional backups or simple one-off exports. But here’s what it can’t do:
| Limitation | What this means for you |
| Single form exports only | Got five contact forms? That’s five separate exports that need to be combined manually. |
| CSV format only | No direct Excel files, no PDFs for client reports. |
| Manual process every time | No scheduling that Monday morning report – you’ll click through these steps weekly. |
| Static filtering | Those filters you carefully set up in your Entries view? Ignored. You’re starting fresh. |
The native export dumps everything based on your export settings, not what you’re actually looking at in your Entries screen.
This disconnect between what you see and what you export is exactly why most users end up searching for better solutions.
Exporting form entries in different file formats
While Gravity Forms only exports to CSV natively, several powerful add-ons enable Excel, PDF, and other format exports that actually work with your existing workflows.
GravityExport

GravityExport transforms your raw form data into polished, professional documents in various formats:
- Excel (.xlsx): Preserves dates as actual dates, numbers as numbers.
- PDF: Maintains your branding with customizable headers, footers, and styling.
- CSV: Enhanced with proper encoding for international characters.
It also directly saves to Dropbox, FTP, or local storage. Set up a secure download link once, share it with stakeholders, and they can grab updated reports anytime – no WordPress login required.
Price: You can purchase yearly licenses starting at $99/year for one site or a lifetime license for $399 per site.
Entry Automation
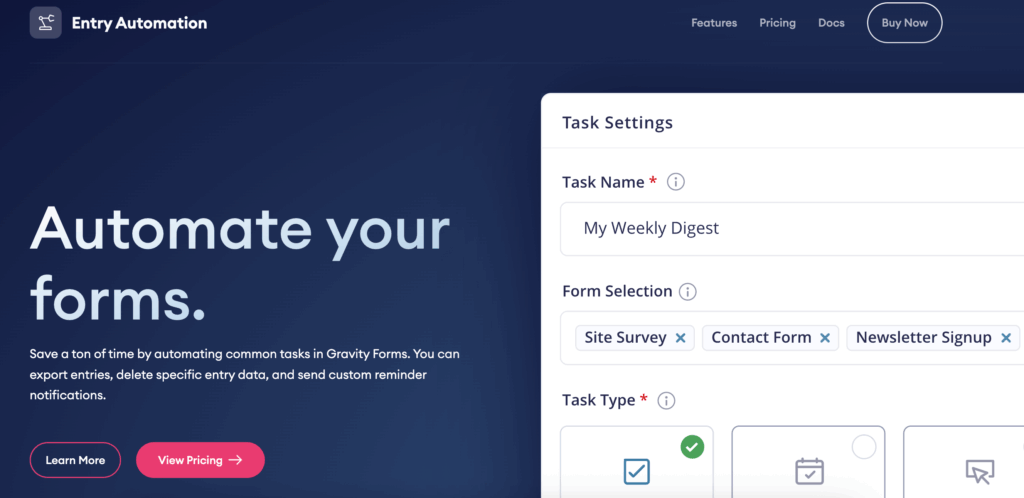
Entry Automation takes a different approach and focuses on eliminating repetitive tasks:
- Automatically emails reports to your entire team.
- Uploads directly to Amazon S3, Dropbox, or FTP servers.
- Schedules exports hourly, daily, weekly, or monthly.
It’s also built for both developers and integrations:
- CSV, Excel, and PDF for standard reporting.
- JSON format for API integrations and custom workflows.
Price: Starting at $15/month for three sites, up to $30/month for 25.
Which one’s right for you?
| Choose GravityExport when: | Choose Entry Automation when: |
| You need polished, branded PDFs. | You’re tired of manual morning exports. |
| Stakeholders need secure download links. | Multiple team members need different data. |
| Professional presentation matters. | Automation trumps everything else. |
Both eliminate the “download CSV, convert to Excel, email to boss” dance – just in different ways.
Bulk exporting entries from multiple forms with Entry Automation
Gravity Forms exports one form at a time, but Entry Automation can combine multiple forms into a single file – a feature that’s saved countless hours for busy teams.
Picture this: You’ve got five lead generation forms scattered across different landing pages. They all collect similar information – name, email, phone, interests. Your sales director wants one consolidated spreadsheet every Monday morning, not five separate files to manually combine.
Entry Automation makes this surprisingly simple.
Here’s the workflow:
-
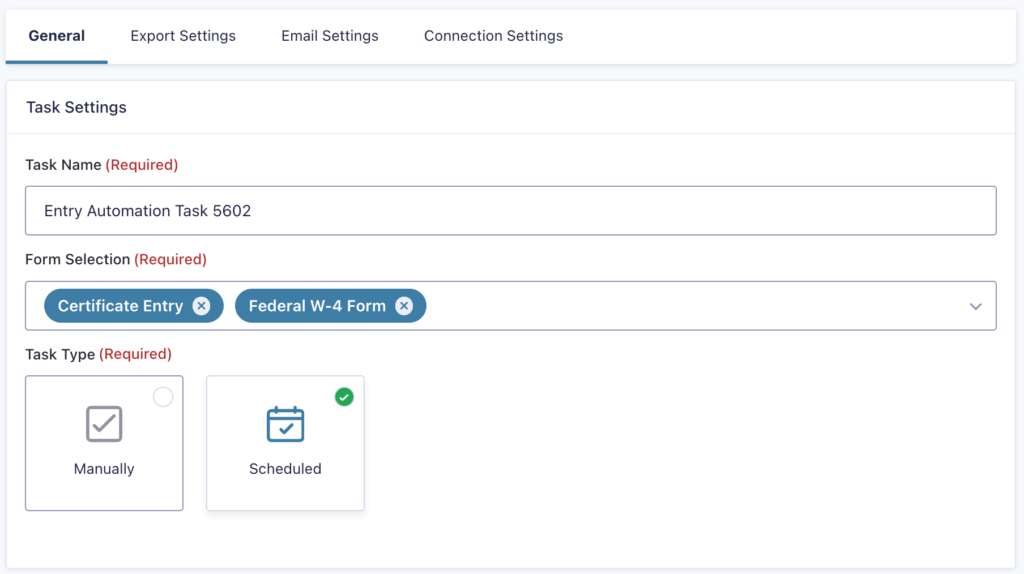
Create your automation task in the Entry Automation dashboard in the Forms > Entry Automation > Multiple Forms Tasks page. Here, you can select all forms to include, assign a name to the automation, and specify the task type – either manual or scheduled.
-
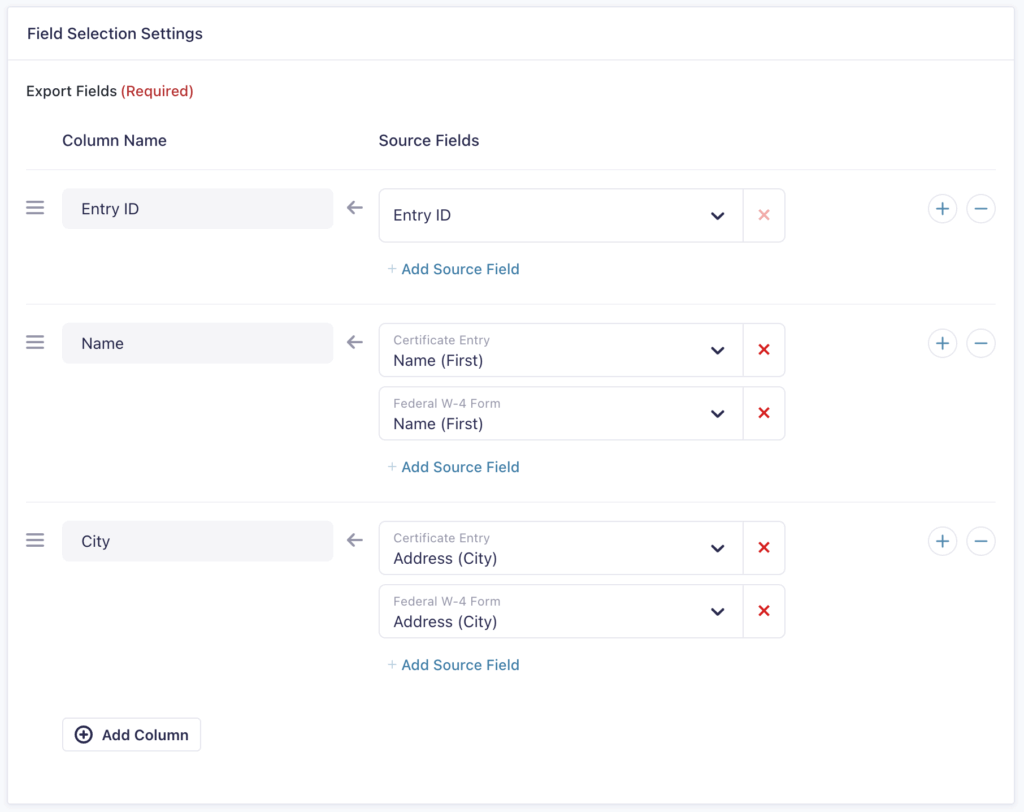
Map your fields intelligently – align “Full Name” from Form A with “Contact Name” from Form B so everything lands in the right columns.
-
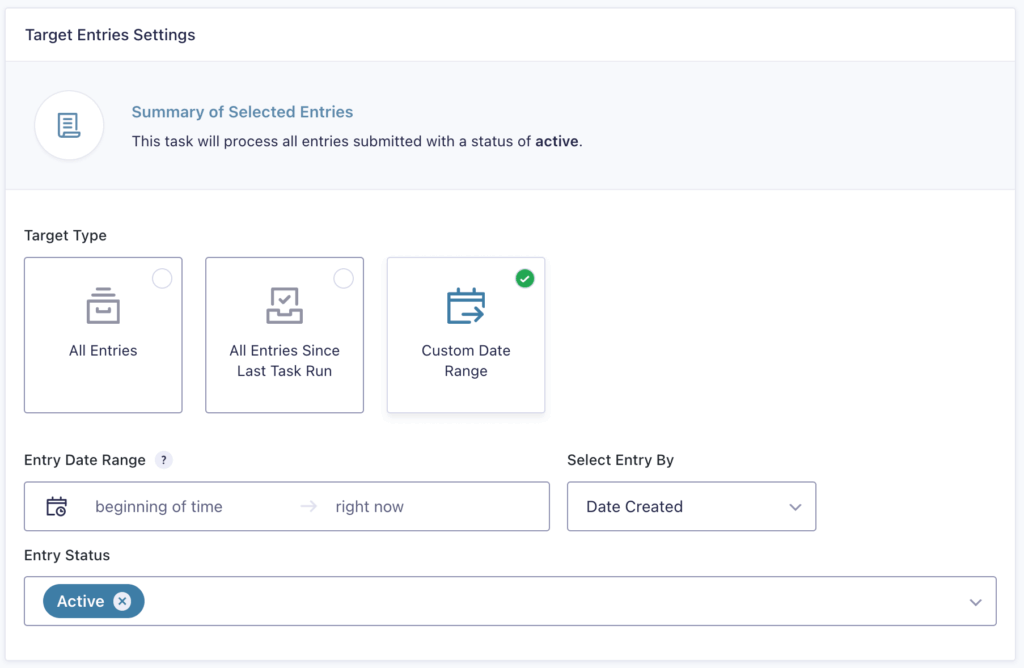
Select a date range if needed.
-
Choose your format and destination – Excel for the sales team, uploaded directly to Dropbox every Monday at 8 AM.
-
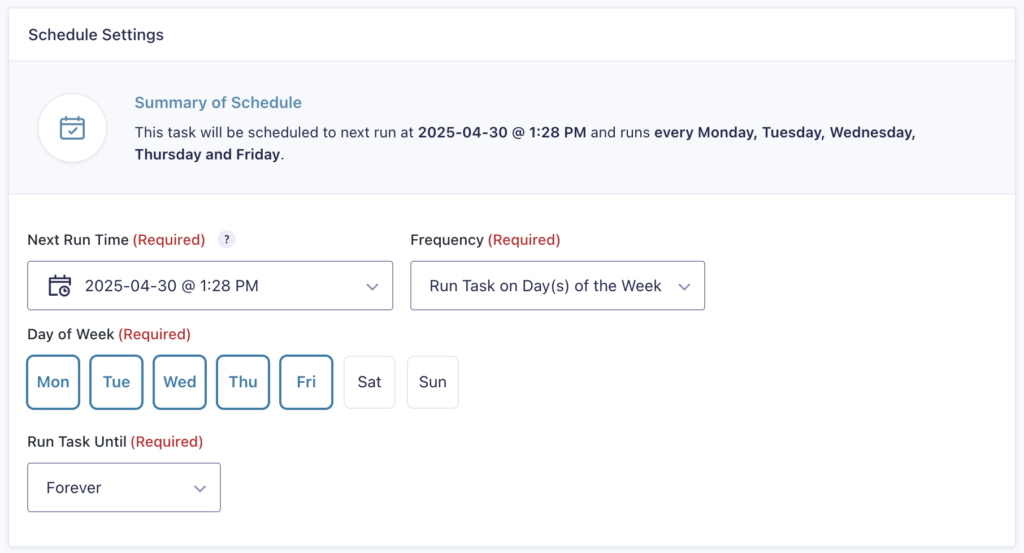
Set your schedule accordingly – daily for high-volume operations, weekly for regular reports, or on-demand when needed.
Real-world applications that just work:
- Customer service consolidation: Five contact forms across your site are consolidated into a single unified support queue.
- Event management: Registration forms for various workshops are merged into a single attendee master list.
- Order fulfillment: Product order forms from various campaigns are combined into a single shipping manifest.
Bonus feature: Entry Automation can automatically delete processed entries after export, keeping your database lean and your site fast. Export, archive, clean – all in one automated workflow.
The catch? You’re still working with raw data.
You can’t preview what’s being exported or fix that typo in someone’s email address before it lands in the spreadsheet. That hands-on preparation is where Admin Columns completely changes the game.
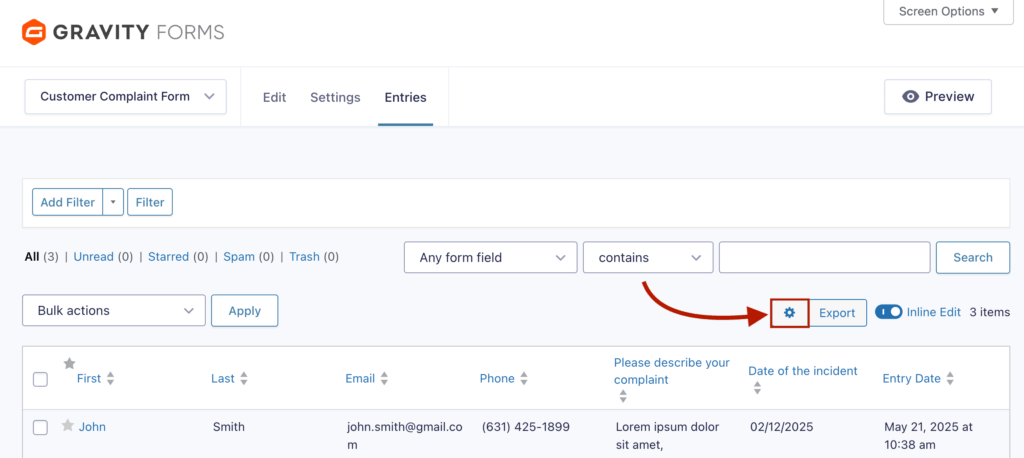
Transform your Entries screen into a data preparation workspace with Admin Columns
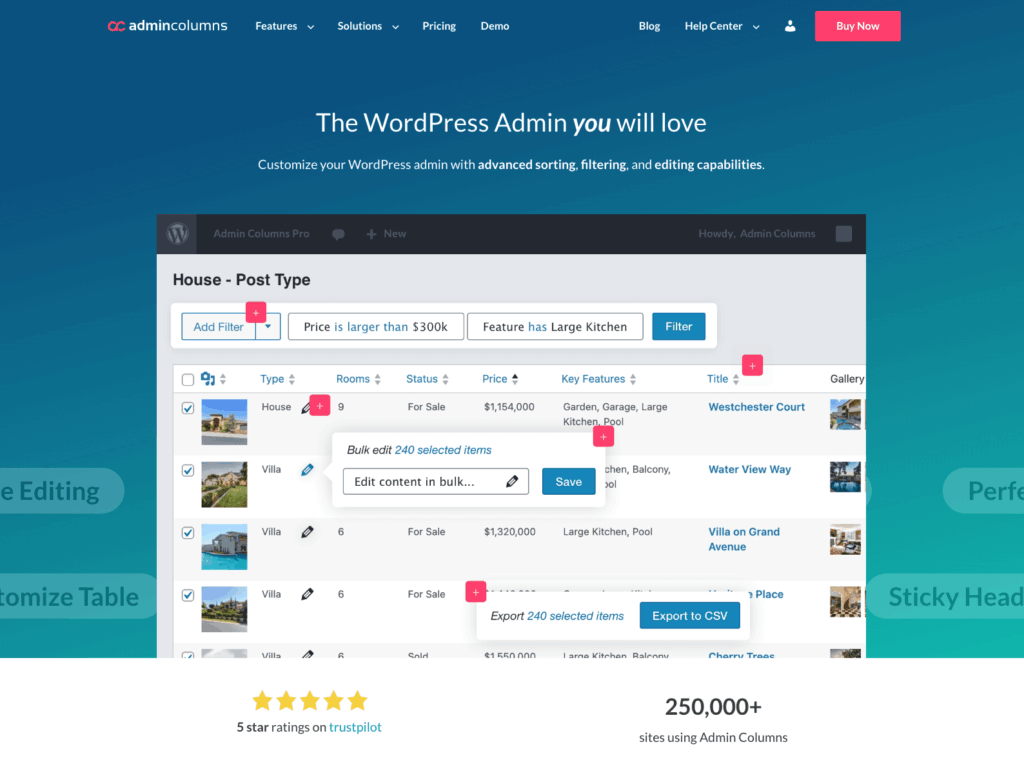
Admin Columns takes a completely different approach. Instead of just adding another export button, it transforms your entire Gravity Forms Entries screen into a powerful data workshop where you prepare, perfect, and then export.
Admin Columns turns your standard Entries list into a spreadsheet-like interface. Filtering, editing, and exporting all happen in the same place you’re already working.
Filter exactly what you need before export
Gone are the days of exporting everything and deleting rows in Excel. With Smart Filters, you build precise data sets right in WordPress:
-
Stack multiple conditions: Complaint message contains “export error” and the date of the incident is between 1 July 2025 and 1 September 2025.
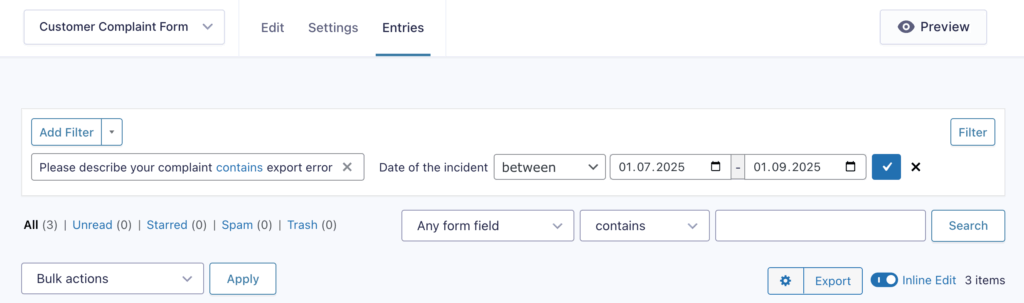
-
See your exact export: What’s on screen is what downloads – no hidden surprises.
-
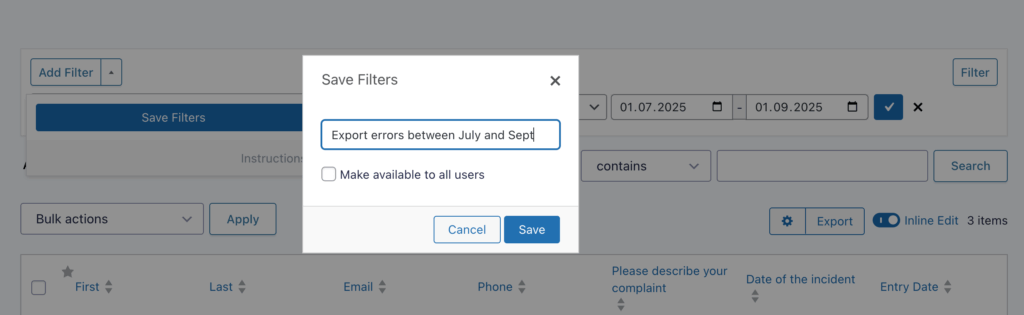
Save filter combinations: Create “Q1 qualified leads” or “This week’s registrations” filters once, reuse forever.
You’re looking at exactly what will export. No guesswork, no nasty surprises when you open the CSV.
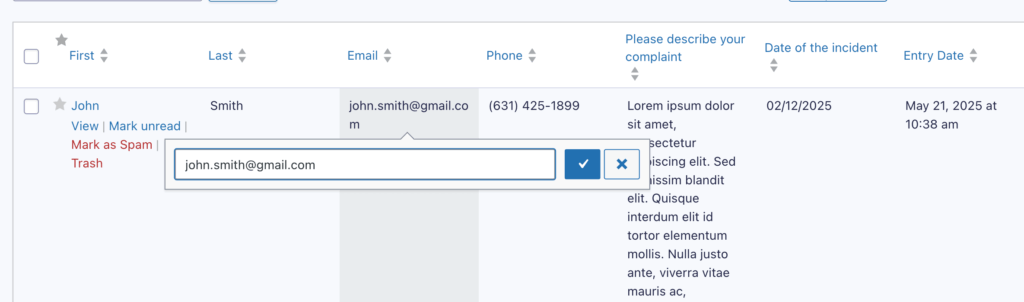
Fix data problems before they reach the spreadsheet
With Admin Columns, your Entries screen becomes an editing powerhouse:
-
With inline editing, you don’t have to open individual entries to make simple corrections: Spot “johm@gmail.com” and fix it to “john@gmail.com” with one click.
-
The bulk edit function lets you edit en masse, no matter how big your database is:
- Select twenty entries with pending payments.
- Change all statuses to “Completed” in seconds.
- Standardize phone numbers from (555) 123-4567 to 555-123-4567 across hundreds of entries.
Export precisely what you see
| What you configure | What you get |
| Five specific columns. | Only those five columns in your CSV. |
| Custom labels like “Customer Email.” | Headers say “Customer Email”, not “field_17.” |
| Filtered to last month’s entries. | Only last month’s data exports. |
| Sorted by total amount descending. | CSV arrives pre-sorted. |
Why this workflow changes everything
Traditional approach: Export → Open Excel → Delete test rows → Fix typos → Reformat → Save → Send
Admin Columns approach: Filter → Fix inline → Export → Send
The difference is profound:
- Test entries? Filtered out before export using Smart Filters.
- Data errors? Fixed at the source with inline editing.
- Wrong columns? Only configured columns appear.
Yes, Admin Columns exports to CSV only. But here’s the thing – because you’ve already cleaned, filtered, and organized everything, that CSV is immediately useful. No post-processing required.
And yes, exports are manual, not scheduled. But that’s actually an advantage: you verify data quality before it reaches your stakeholders. No more “Sorry, ignore that last spreadsheet” emails.
How to set up custom columns for Gravity Forms with Admin Columns
Setting up Admin Columns for Gravity Forms takes about five minutes – and completely transforms how you work with entry data.
Initial configuration
Navigate to Settings → Admin Columns in your WordPress dashboard, then select your Gravity Form from the dropdown. You’ll see your current Entries table layout, and from there, you can click to edit the columns that appear.
Click the “+ Add Column” button to start building your custom view.
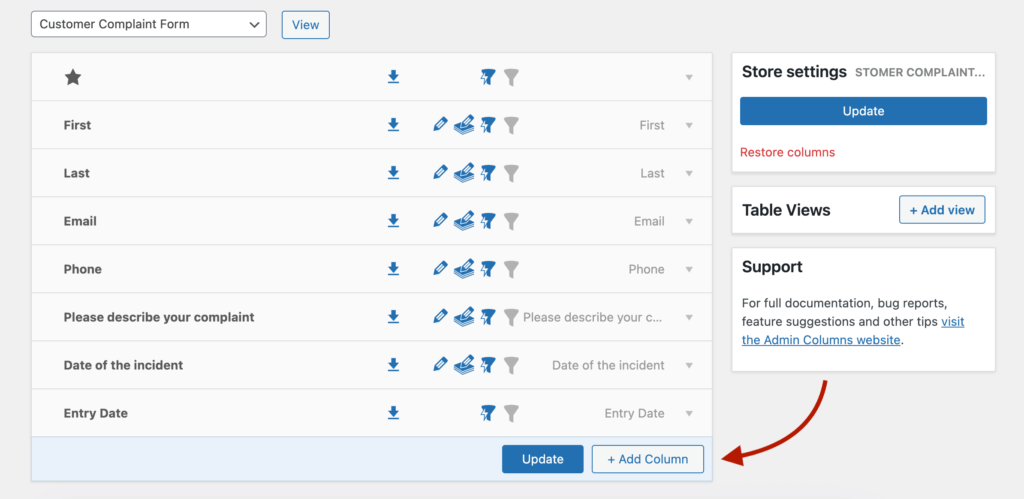
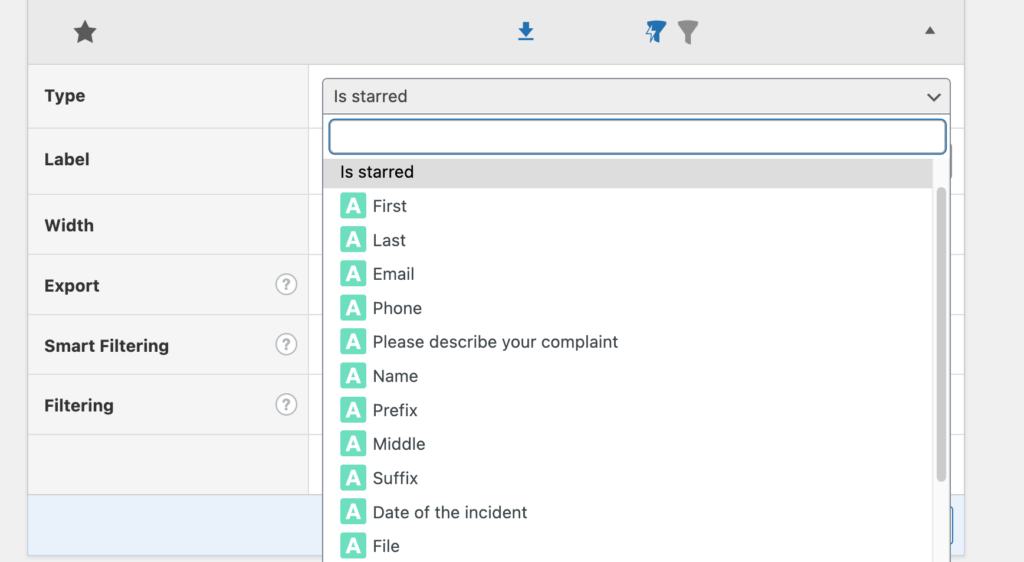
From there, you can add almost any form field as a column, including custom fields from plugins like Advanced Custom Fields.
- Include custom fields you’ve created
- Add entry metadata like submission date or user IP
Critical step: For each column you want in your exports, click the small export icon to enable it. No icon = no export. This prevents accidentally sharing sensitive data.

Drag and drop to arrange columns in your preferred order. This exact sequence appears in your CSV exports – no more reorganizing in Excel.
Column options that make exports actually useful
Each column has settings that transform raw data into professional outputs:
Smart labeling
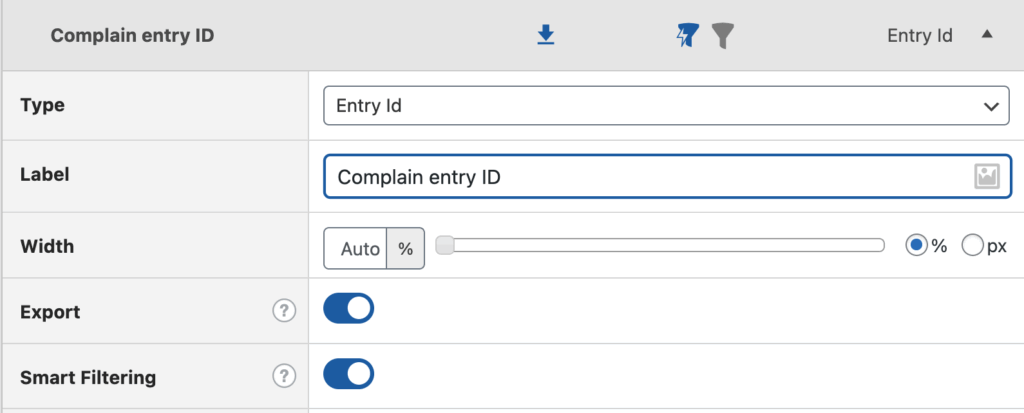
- Rename “field_17” to “Customer Phone.”
- Change “gf_total” to “Order Amount.”
- Your exports arrive with headers that make sense.
Custom filters
Build filters that match your actual export needs, for example, this month’s qualified leads:
- Date range: Current Month.
- Lead score: Greater than 70.
- Status: Not equal to “Test.”
Save these filter combinations with descriptive names. Next time you need that exact data set, it’s one click away.
Strategic inline editing
Turn on editing for fields that frequently need corrections:
- Email addresses (fix typos immediately)
- Phone numbers (standardize formats)
- Status fields (bulk update payment statuses)
Configure bulk edit for efficiency – select fifty entries and update their category in one action.
Table views
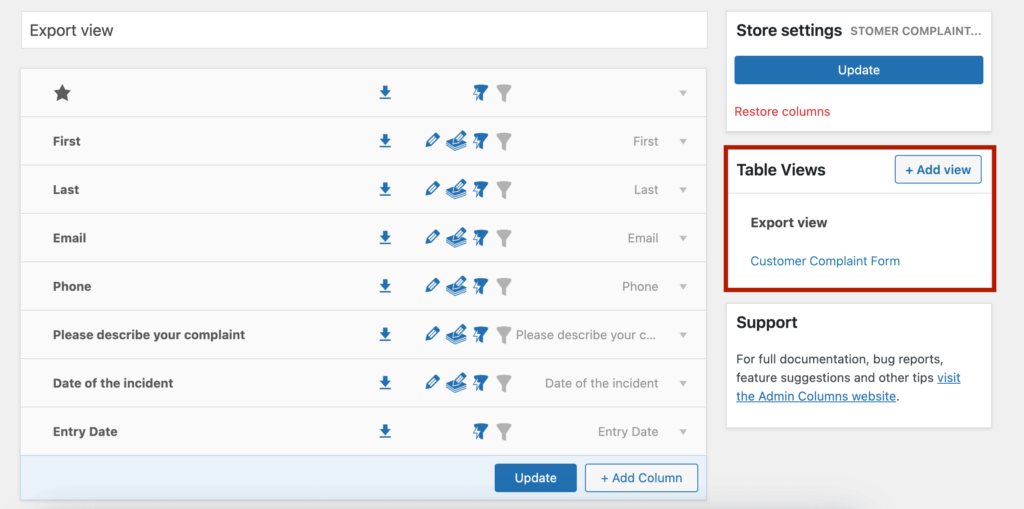
Different tasks need different views:
| View Name | Purpose | Columns Included |
| Full Export | Complete data archives | All 23 fields, including metadata |
| Daily Review | Quick status checks | Name, Email, Status, Total (4 fields) |
| Finance Export | Accounting reports | Order ID, Customer, Amount, Tax, Payment Method |
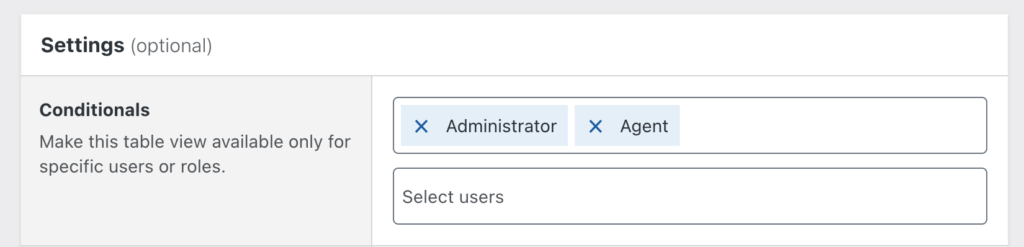
Switch between views instantly using the dropdown menu. Each view remembers its export settings and can have restricted access:
The transformation is complete: Your Entries screen is now a professional data management interface. You’re not just triggering exports anymore – you’re curating, cleaning, and controlling exactly what data leaves your WordPress site.
Common Gravity Forms export problems and solutions
Let’s tackle the export headaches that eat up your mornings. These issues pop up constantly, but the fixes are surprisingly simple once you know where to look.
Can’t find the export button
The most common problem? Looking in the wrong place entirely. The native export doesn’t live in your Entries screen – it’s hiding at Forms → Import/Export → Export Entries. Users spend ages hunting through the Entries interface when the button’s actually three menu clicks away.
Exports timing out with large datasets
Hit 10,000 entries and watch your export die mid-process. PHP execution limits are the culprit.
Quick fixes:
- Export in chunks: January entries, then February, then March.
- Increase your server’s max_execution_time to 300 seconds.
- Use a plugin like Admin Columns that handles batching automatically.
Excel scrambles your data
Opening a CSV in Excel is like playing data roulette:
- Phone numbers starting with 0 lose that zero.
- Dates flip from 12/01/2024 to December 1st.
- Long numbers turn into scientific notation.
Prevention beats correction: Use GravityExport’s native Excel format, or clean everything in Admin Columns first so your CSV needs zero post-processing.
Test entries polluting exports
“Why is test@example.com in our client report… again?”
Two solutions that actually work:
- Add conditional logic during export: Email “is not” test@example.com.
- Use Admin Columns Smart Filters to hide test entries before they ever reach your export.
No more manual deletion in spreadsheets.
Multiple forms need combining
Native Gravity Forms simply can’t merge multiple forms. Your options:
- Entry Automation for automated combining.
- Manual copy-paste between CSV files (painful but free).
- Export each form with identical columns, then combine in Excel.
Forgotten entries after deletion
That sinking feeling when you realize you deleted entries you actually needed.
The smart workflow:
- Export the complete backup first.
- Then delete for performance.
- Entry Automation can automate this entire archive-then-delete process.
Different departments need different data
Marketing wants email addresses. Finance needs payment info. Support requires ticket details.
Stop exporting everything and manually splitting files. Instead, use Admin Columns to create saved filter sets:
- “Marketing Export” (email, name, campaign source).
- “Finance Export” (order ID, amount, payment method).
- “Support Export” (ticket number, issue, status).
Or create different table views based on WordPress user roles.
Missing export permissions
“Where’s my export button?” Sometimes it’s not lost – it’s restricted.
Check Users → User Role Editor and verify the user has:
- gravityforms_export_entries capability.
- Access to the specific form.
- Proper WordPress admin permissions.
Start managing your form data more efficiently today
Professional data export doesn’t happen just by adding more export buttons in WordPress, but by preparing your data properly before it ever leaves your site.
Choose your tool based on your actual needs:
- Native Gravity Forms export works perfectly for quick backups and simple one-time exports. No setup, no complexity – just download and go.
- Entry Automation or GravityExport shine when you need scheduled reports, multi-form consolidation, or automated delivery. Set up once, let it run forever.
- Admin Columns is essential when you need to filter, clean, and verify data before export. This is where the magic happens.
The Admin Columns transformation is real: your Entries screen becomes a complete data preparation workspace. Filter down to exactly what you need, fix that embarrassing typo inline, standardize those phone numbers, then export clean data your colleagues can immediately use.
Ready to transform how you work with Gravity Forms data? Start with Admin Columns and turn your Entries screen into the powerful data tool you’ve been wishing for.
Get Admin Columns Pro
Effortlessly sort, filter, edit, export, and organize content in the WordPress admin.
